Nginx ProxMox Proxy using Letsencrypt SSL cert
Why use a nginx proxmox proxy using letsencrypt ssl?
1st: why not?
2nd: Load balancing! Nginx is built to handle many concurrent connections at the same time from multitude of clients. This makes it ideal for being the point-of-contact for said clients. The server can pass requests to any number of backend servers to handle the bulk of the work, which spreads the load across your infrastructure. This design also provides you with flexibility in easily adding backend servers or taking them down as needed for maintenance.
3rd: Security! Many times Nginx can be secured to not allow access to certain parts of the underlying application so life doesnt throw you a curveball at 3AM on December 24th 2006(dont ask 🙁 ).
4th: Port firewall constraints! Sometimes you need to access an application on port 34563 but firewall doesn’t allow access on random ports. You can allow incoming connections on port 80 via nginx but proxy them to the app on 34563.
5th: seriously… why not…..
Now you know why we may want nginx as a frontend proxy for our underlying app. so let’s get to setting it up for our use case which is to protect proxmox from bad actors! and to provide reliable access to our proxmox for ourselves. We are going to setup nginx to forward all traffic from port 80 to port 443 where letsencrypt will provide us with ssl encrypted access!
Install nginx light instead of full, so you have a smaller set of utilities but also a lighter install. you can install nginx or nginx-full also if you wish.
apt-get install nginx-light
remove default nginx config
rm /etc/nginx/sites-enabled/default
add new nginx config copying the code below
nano /etc/nginx/sites-enabled/default
add the folllowing in there
upstream proxmox {
    server "proxmoxdomain.com";
}

server {
    listen 80 default_server;
    location ~ /.well-known {
      root "/var/www/html";
      allow all;
    }
    rewrite ^(.*) https://$host$1 permanent;

}

server {
    listen 443;
    server_name _;
    ssl on;
    ssl_certificate /etc/letsencrypt/live/proxmoxdomain.com/fullchain.pem;
    ssl_certificate_key /etc/letsencrypt/live/proxmoxdomain.com/privkey.pem;
    include ssl-params.conf;
    proxy_redirect off;

        location ~ /.well-known {
                root "/var/www/html";
                allow all;
        }

    location / {
        proxy_http_version 1.1;
        proxy_set_header Upgrade $http_upgrade;
        proxy_set_header Connection "upgrade";
        proxy_set_header  Host  $host;
        proxy_set_header  X-Real-IP  $remote_addr;
        proxy_pass https://localhost:8006;
        proxy_buffering off;
        client_max_body_size 0;
        proxy_connect_timeout  3600s;
        proxy_read_timeout  3600s;
        proxy_send_timeout  3600s;
        send_timeout  3600s;
    }
}
install git
apt-get -y install git
grab a copy of letsencrypt client
git clone https://github.com/letsencrypt/letsencrypt /opt/letsencrypt
get the certs
cd /opt/letsencrypt
./letsencrypt-auto certonly -a webroot --webroot-path=/var/www/html -d proxmoxdomain.com
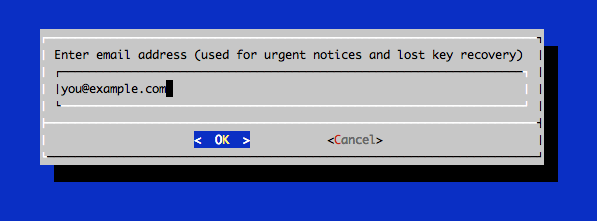
specify your email when asked, this is only to retrieve lost certs.
 Agree to the TOS.
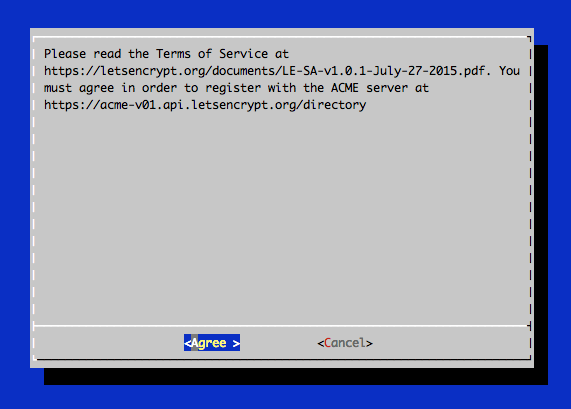
you will get 4 files from this:
- cert.pem: Your domain’s certificate
- chain.pem: The Let’s Encrypt chain certificate
- fullchain.pem:
cert.pemandchain.pemcombined - privkey.pem: Your certificate’s private key
these files are located in
- /etc/letsencrypt/live/proxmoddomain.com
Now that your certs are live and running! restart your nginx and you are live!
service nginx restart
or
systemctl restart nginx