SSHFS: Ditch SCP & Access Remote Files
Ever felt the frustration of needing a file from your home server, or wanting to edit a config file on your remote media server, and having to constantly scp files back and forth? It feels… clunky, right? Like you’re stuck in the digital equivalent of carrying physical files up and down stairs.
What if you could wave a magic wand and make that remote folder just appear on your local machine? What if you could open files directly in your favorite apps, save changes instantly, and treat them as if they were sitting right there on your desktop?
Well, friend, no magic wand is required. What you need is SSHFS!
In this article, we’re going on a journey from being a total SSHFS newbie to confidently using it like a pro. We’ll demystify what it is, why it’s awesome, how to get it running on your Ubuntu (and briefly, Fedora!) machine, explore some cool uses, tackle common problems, and unlock powerful tips to make your remote file access buttery smooth.
Ready to ditch the scp dance and embrace the mounted lifestyle? Let’s dive in!
So, What Exactly Is SSHFS?
Let’s break down the name: SSH FileSystem.
- SSH: You probably know this one! It’s the secure shell protocol, the rock-solid, encrypted tunnel you use to log into remote servers securely.
- FS: Filesystem. This is how your operating system organizes and accesses files and folders on a storage device (like your hard drive).
Put them together, and you get a way to use the secure SSH connection you already rely on to mount a remote filesystem directory onto your local machine.
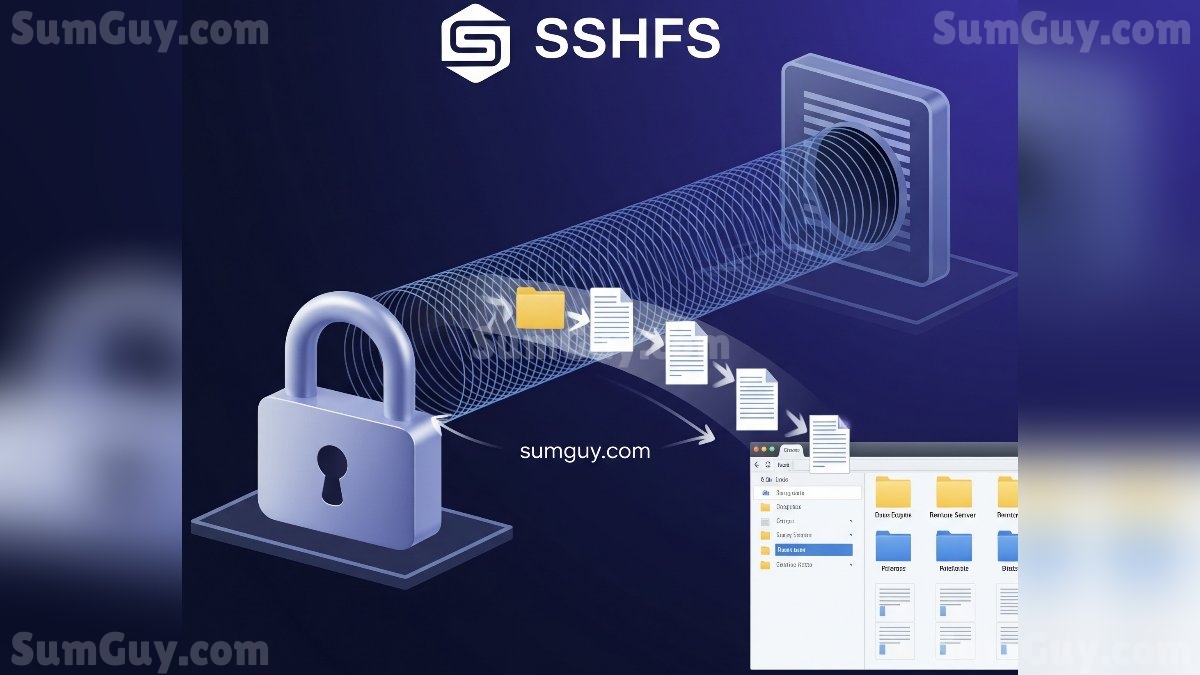
Think of it like this: SSHFS creates a secure tunnel to your remote server and tricks your local operating system into thinking that remote folder is just another drive or folder attached directly to your computer.
This isn’t like SCP or SFTP, which are primarily for transferring files. With SSHFS, the files stay on the remote server, but you can interact with them locally: open, edit, save, delete, run, or even stream (though be mindful of performance!) as if they were local.
And because it uses SSH, it automatically inherits all that lovely security you’re used to – encryption, authentication (passwords or, even better, SSH keys!). No need to set up complicated, less secure protocols just for file access.
Why Would I Want to Use SSHFS? (The Superpowers!)
Okay, making a remote folder look local sounds neat, but what are the real-world benefits?
- Seamless Access: This is the big one. Edit configuration files, open documents, browse photo libraries, or access codebases on your server without downloading anything first. Your favorite local text editor, IDE, file manager, or media player can work directly on the remote files.
- Security: It rides on SSH. If you trust your SSH connection, you trust your SSHFS connection. Much more secure than exposing other file-sharing protocols (like raw SMB or NFS without proper setup) to the internet.
- Convenience: No need for dedicated file transfer clients for most tasks. Your standard file explorer works just fine!
- Simplicity (Once Set Up): For basic usage, the command is quite straightforward. And for regular access, you can automate it (more on that later!).
- Works Over the Internet: Unlike protocols designed primarily for local networks (like NFS or SMB), SSHFS works perfectly fine over the internet, provided your SSH port is accessible (and secured!).
Use Cases: Where SSHFS Shines
Let’s look at some scenarios where SSHFS is a real game-changer, especially for our home lab/server enthusiasts:
- Managing Your Home Server Files: Got a headless server tucked away running services? SSHFS lets you access its file system effortlessly from your desktop. Need to drop a new file into your web server’s directory? Mount the directory and drag and drop. Need to tweak a Plex config? Mount the config folder and edit it with
geditorvscodelocally. - Accessing Remote Media Libraries: While streaming is common, sometimes you might want to organize, rename, or grab a specific file from a remote media server’s library. Mounting the media folder via SSHFS lets you use your local file manager to do this visually and easily.
- Working with Game Server Files: Hosting a Minecraft, Valheim, or other game server? Managing worlds, mods, or configuration files can be tedious via SCP. Mount the game server’s main directory and navigate it like a local folder. Drag and drop mods, edit server properties with your favorite local editor, and save directly.
These are just a few examples. Any time you find yourself frequently needing to access and interact with files on a remote Linux machine, SSHFS is probably a better solution than constant scp or SFTP sessions.
Getting Started: Installing SSHFS
Okay, enough talk! Let’s get this thing on your machine. SSHFS relies on a kernel module called FUSE (Filesystem in Userspace), which allows non-root users to mount filesystems. Luckily, modern Linux distributions have FUSE built-in, and the SSHFS tool is readily available.
We’ll focus on Ubuntu, with notes for Fedora users.
For Ubuntu Users:
Open your terminal. This is usually a single command:
sudo apt update
sudo apt install sshfsThat’s it! apt will handle downloading and installing SSHFS and any necessary dependencies.
For Fedora Users:
Open your terminal and use the dnf package manager:
sudo dnf install sshfsJust like Ubuntu, dnf will sort everything out for you.
Verification:
To check if it’s installed correctly, just type:
sshfs --versionYou should see output showing the version number. If you get a “command not found” error, double-check the installation steps.
Basic Usage: Mounting and Unmounting Your First Remote Folder
Alright, the tool is installed. Let’s connect to a remote server!
First, make sure you can SSH into the remote server normally. You’ll need the server’s IP address or hostname, your username on that server, and potentially your password or SSH key.
Next, you need a local directory where the remote filesystem will be mounted. This directory should ideally be empty.
Let’s create one:
mkdir ~/remote_server_filesNow, the magic command! The basic syntax looks like this:
sshfs username@remote_host:/remote/path /local/mountpointLet’s say your remote server is at 192.168.1.100, your username there is myuser, and you want to mount the /home/myuser/documents folder on the remote server to your local ~/remote_server_files directory.
The command would be:
sshfs myuser@192.168.1.100:/home/myuser/documents ~/remote_server_filesWhen you hit Enter, SSHFS will prompt you for your remote user’s password (unless you’re using SSH keys, which you really should be – more on that later!).
If successful, you won’t see much output, but if you open your file manager and navigate to ~/remote_server_files, you should now see the contents of /home/myuser/documents from the remote server! You can interact with these files as if they were local.
Checking the Mount:
To confirm it’s mounted, you can use the df -h command (which shows disk space usage for mounted filesystems) or simply mount | grep sshfs:
df -h # Look for your mount path
mount | grep sshfs # Should show the sshfs mount detailsUnmounting the Remote Folder:
When you’re done, it’s crucial to unmount the filesystem properly. Don’t just close the terminal or shut down your computer! Use the fusermount command with the -u flag (for unmount) followed by your local mount point:
fusermount -u ~/remote_server_filesAgain, success usually means no output. Your ~/remote_server_files directory should now be empty (or show whatever was originally in it before mounting).
Important Note about umount: You might be familiar with the standard umount command. While it can sometimes work with FUSE mounts, fusermount -u is the recommended and often more reliable way to unmount filesystems mounted by a non-root user via FUSE/SSHFS.
Becoming a Pro: Advanced Options and Tips
Now that you’ve got the basics down, let’s unlock some pro moves to make your SSHFS experience even better.
1. Use SSH Keys (Seriously!)
Typing your password every time you mount is tedious and less secure than using SSH keys. If you’re not using them already, set them up! There are tons of guides online for generating SSH keys and copying them to your server (ssh-copy-id). Once set up, the sshfs command won’t prompt for a password. This is essential for automation!
2. Simplify with SSH Config File
Instead of typing myuser@192.168.1.100 every time, use the SSH configuration file (~/.ssh/config).
Edit or create the file ~/.ssh/config:
nano ~/.ssh/configAdd an entry for your server:
Host myserver
    Hostname 192.168.1.100
    User myuser
    Port 22 # Or your custom SSH port
IdentityFile ~/.ssh/id_rsa # If you're using a specific keySave the file. Now you can SSH to your server just by typing ssh myserver. Even cooler? You can use the Host alias with SSHFS!
sshfs myserver:/home/myuser/documents ~/remote_server_filesMuch cleaner, right?
3: Performance Tuning Options
SSHFS can sometimes feel a bit slow, especially over high-latency connections or when dealing with lots of small files. Here are a few options to potentially speed things up (add these using the -o flag):
-o cache=yes: Enables inode caching. This is often the most impactful performance option. SSHFS caches file attributes (like size, permissions) and directory listings.-o auto_cache: Similar tocache=yes, but the cache expires based on the file’s modification time. Can be slightly safer if files change frequently on the server outside of your SSHFS session.-o kernel_cache: Allows the Linux kernel to cache data, not just metadata. Can provide significant speedups for file reads, but be cautious if files are modified frequently by other processes on the server, as your local cache might become stale. Use with care!-o Compression=no: By default, SSH might compress data. For faster connections, disabling compression can sometimes improve speed at the cost of higher bandwidth usage. Test if this helps in your specific situation.
You can combine options, separated by commas:
sshfs -o cache=yes,Compression=no myserver:/remote/path /local/mountpointExperiment with these to find what works best for your connection and workload.
4. Handling Disconnections
Internet connections can be flaky. By default, if the SSH connection breaks, your SSHFS mount will freeze up. These options can help:
-o reconnect: Tries to automatically reconnect if the connection drops. Very useful!-o auto_reconnect: Similar toreconnect, often used together or interchangeably depending on the SSHFS version and FUSE options.
sshfs -o reconnect,auto_reconnect myserver:/remote/path /local/mountpoint5. Mounting at Boot with /etc/fstab (Advanced – Handle with Care!)
This is where you go from user-level mounting to system-level integration. You can configure SSHFS to mount automatically when your computer starts by adding an entry to the /etc/fstab file.
WARNING: This is powerful and requires SSH keys for the user SSHFS will run as. NEVER put passwords in /etc/fstab or related script files! Also, issues with the mount (like the server being unreachable) can potentially slow down or even block your boot process. Proceed with caution and ensure you have a way to edit fstab from a recovery environment if something goes wrong.
You’ll need to figure out which user should own the mount. Often, this is your regular user account.
- Ensure the SSH key works without a passphrase for the user that will perform the mount, or that an SSH agent is properly set up and started at boot.
- Ensure the local mount point exists and has appropriate permissions for the user.
- Edit
/etc/fstab(requiressudo):
sudo nano /etc/fstabAdd a line for your SSHFS mount. The format is tricky and requires specific FUSE options:
user@remote_host:/remote/path /local/mountpoint fuse.sshfs _netdev,users,idmap=user,IdentityFile=/home/youruser/.ssh/id_rsa,allow_other,default_permissions,reconnect,auto_reconnect 0 0Let’s break down the important options here:
fuse.sshfs: Specifies the filesystem type._netdev: Tells the system that this is a network filesystem and should wait until the network is available before trying to mount. Crucial for boot mounts!users: Allows any user in theusersgroup to mount and unmount this entry (though typically the mount is done by the system or a specific user at boot).idmap=user: Maps the remote user’s UID/GID to the local user’s UID/GID. Essential for correct permissions when accessing files.IdentityFile=/home/youruser/.ssh/id_rsa: Specifies the SSH key file to use. Update/home/youruser/.ssh/id_rsato your actual user and key path.allow_other: Allows users other than the one who initiated the mount to access the mounted files (necessary if mounting at boot for interactive user sessions).default_permissions: Allows the kernel to enforce permissions based on the remote file’s permissions, modified byidmap.reconnect,auto_reconnect: Good idea for reliability.0 0: Filesystem dump frequency (0 = never), Filesystem check order (0 = none).
Test the entry before rebooting:
sudo mount /local/mountpoint- If this command runs without errors and you can access the mounted directory, your
fstabentry is likely correct. If there are errors, fix them before rebooting! - Unmount the test mount:
sudo umount /local/mountpointMounting at boot is powerful, but requires careful configuration and testing. Use it when you absolutely need the remote filesystem available immediately after startup.
SSHFS Gotchas: Common Pitfalls and How to Fix Them
Even seasoned pros bump into issues. Here are some common SSHFS problems and how to troubleshoot them:
- “device is busy” or “target is busy” when unmounting (
fusermount -u)- Cause: You (or an application) are currently inside the mounted directory or accessing a file within it.
- Fix: Close any open files or applications that are using the mounted directory. Open a new terminal window and navigate out of the mount point (e.g.,
cd ~). Then tryfusermount -u /local/mountpointagain. If you can’t figure out what’s using it,lsof /local/mountpointcan sometimes show you processes with open files in that location. If all else fails (and you’re sure no critical writes are happening),fusermount -u -z /local/mountpointcan sometimes “lazy” unmount, detaching when the resource is no longer busy (use with caution).
- Permission Denied
- Cause:
- You don’t have SSH access to the remote server or directory.
- The local user you’re running SSHFS as doesn’t have read/write permissions on the remote files/folders via the remote user account.
- Incorrect or missing
idmapoptions (if files appear with wrong ownership/permissions locally).
- Fix:
- Verify you can
sshinto the server normally. - Check file/folder permissions on the remote server for the user you’re connecting as.
- Ensure your
sshfscommand includes appropriateidmap=userand possiblyallow_other,default_permissionsoptions, especially if mounting as root or for multiple users.
- Verify you can
- Cause:
- Mount point is not empty
- Cause: You tried to mount SSHFS on a directory that already contains files.
- Fix: SSHFS requires an empty directory as a mount point. Create a new, empty directory or move the contents out of the existing one before mounting.
- Connection Freezing or Becoming Unresponsive
- Cause: Network issues, server load, or the SSH connection dropped without using reconnect options.
- Fix: Check your network connection. Check the server’s status. Ensure you are using the
-o reconnect,auto_reconnectoptions. Sometimes simply unmounting (if possible) and remounting fixes it.
- Slow Performance
- Cause: High network latency, transferring lots of small files, lack of caching.
- Fix: Experiment with performance tuning options like
-o cache=yes,-o auto_cache, and potentially-o Compression=no. A faster network connection or a server closer geographically will also help significantly.
Alternatives (Why SSHFS Might Be Your Jam)
While SSHFS is awesome, it’s not the only way to access remote files. You might encounter:
- SCP/SFTP: Great for one-off file transfers, but cumbersome for Browse and editing.
- rsync: Excellent for synchronization and backups, but not designed for interactive file access.
- NFS (Network File System): Common on Linux networks, often faster than SSHFS on a local network, but requires more complex setup, is less secure out-of-the-box over the internet, and typically needs root privileges to mount.
- SMB/Samba: Standard for Windows file sharing. Like NFS, great for LANs, more complex setup for secure internet access.
SSHFS strikes a great balance for secure, convenient, user-level mounting, especially over the internet or for accessing single directories without needing full system-level file sharing setup.
Conclusion: You’re an SSHFS Master Now!
You’ve done it! You’ve gone from potentially not knowing what SSHFS was to understanding its core concept, installing it, using basic commands, exploring powerful advanced options, and learning how to tackle common issues.
SSHFS is an invaluable tool in any Linux user’s kit, bridging the gap between your local machine and remote servers with elegance and security. Whether you’re managing files on a headless server, organizing a media library, or tweaking game server settings, SSHFS makes the remote feel local.
Start integrating it into your workflow. Begin with simple mounts, then explore the caching and reconnect options. When you’re feeling brave, tackle the fstab entry for your most-used remote folders.
Goodbye, constant scp prompts! Hello, seamless remote file access!


