Backups Are ETL for Your Future Regret
You’re three months into running a stateful workload on Kubernetes. The database tier looks bulletproof. The PVCs are mounted. Monitoring is configured. Everything is fine. Then, at 2 AM, someone typos a delete in a YAML and suddenly your production cluster is gone—not crashed, not degraded, just gone. The kubectl command fired. The resources evaporated.
That’s when you realize your backup strategy is “pray the cloud provider keeps redundancy.”
Here’s the thing: Velero exists for exactly this moment. It’s a Kubernetes-native backup and disaster recovery tool that captures your entire cluster state—every resource definition, custom resource, namespace, and persistent volume—and lets you replay it on a fresh cluster in minutes. No manual kubectl apply, no guessing which resources to restore, no 3 AM spreadsheet archaeology.
Originally built by Heptio (acquired by VMware, now Broadcom), Velero is open source, Cloud Native Computing Foundation Sandbox-level, and battle-tested by organizations running anything from one-node home labs to sprawling multi-cluster estates. We’re going to cover what it actually backs up, how to set it up, the storage tradeoffs, and the real runbook for “the cluster is burning, what now?”
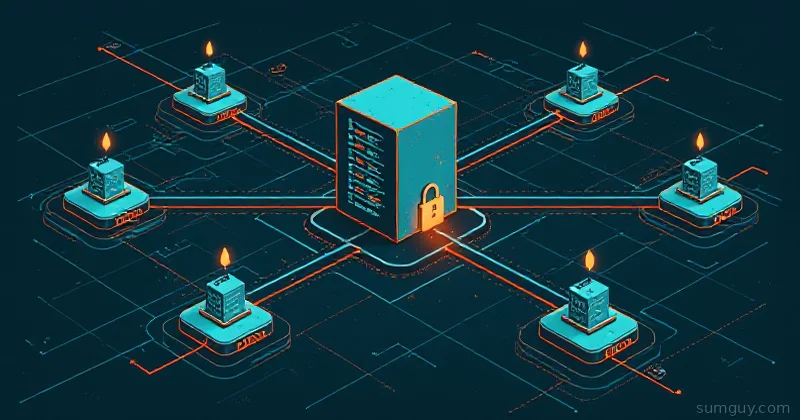
What Velero Actually Does
Most backup solutions for Kubernetes focus on the data layer: “Save my databases, save my volumes.” That’s half the story. Velero takes a different approach—it backs up cluster state (all resources via the Kubernetes API), persistent volume data (via CSI snapshots or Restic node agents), and optionally hooks into your applications for quiescing (flushing buffers, freezing transactions).
The Backup Scope
When you create a Velero backup, it:
- Snapshots the Kubernetes API — Walks through all resources (Deployments, StatefulSets, Services, Ingress, ConfigMaps, Secrets, CRDs, everything) and serializes them to JSON/YAML
- Captures PV data — Either via CSI snapshots (if your storage driver supports them) or by mounting volumes on a node agent and uploading data to object storage
- Stores metadata in S3-compatible storage — MinIO, AWS S3, Backblaze B2, Garage, whatever you’ve got
- Optionally runs pre/post-backup hooks — Custom scripts (flush the database, quiesce the app) before and after the backup
- Creates Backup CRDs in-cluster — You can
kubectl describe backup my-backupand see exactly what was captured
The result: a complete, reproducible snapshot of your cluster that you can restore to any Kubernetes cluster running the same version (or newer, usually).
Why This Beats Manual Backup Strategies
I’ve watched teams try to DIY this:
- Shell scripts that
kubectl get alland spit YAML files to S3 (works until you forget to include CRDs or your CustomResourceDefinitions silently skip) - Velero’s predecessor, Heptio Ark, which did this well but was discontinued
- Stash (Appscode) — more feature-rich but overkill for most self-hosters
- Kasten K10 — enterprise-grade, costs real money, needs its own persistent storage
Velero splits the difference: it’s simple enough to run on a single-node cluster with a MinIO bucket, but sophisticated enough to handle namespaced backups, cross-cluster restores, and complex restoration workflows. And it’s free.
Installation: Helm or Velero CLI
You’ll need:
- A running Kubernetes cluster (1.20+)
- Object storage backend (MinIO, AWS S3, Backblaze, Garage)
- Helm 3, or the
veleroCLI tool
Option 1: Helm (Recommended)
helm repo add vmware-tanzu https://vmware-tanzu.github.io/helm-chartshelm repo update
helm install velero vmware-tanzu/velero \  --namespace velero \  --create-namespace \  --values values-velero.yaml
Where values-velero.yaml includes your S3 backend credentials:
configuration:  backupStorageLocation:    bucket: "velero-backups"    provider: aws    config:      s3Url: "https://minio.your-domain.com"  # MinIO endpoint      accessKey: "minioadmin"      secretKey: "your-secret-key"      region: "us-east-1"  # dummy for MinIO, required by boto3  volumeSnapshotLocation:    provider: aws    config:      snapshotLocation: "us-east-1"
schedules:  daily-backup:    schedule: "0 2 * * *"    template:      ttl: "720h"  # 30 days      includedNamespaces: ["*"]
image:  repository: velero/velero  tag: "v1.13.1"  # Pin the version
credentials:  useSecret: true  existingSecret: velero-credentials
Then create a Secret with your S3 credentials:
kubectl create secret generic velero-credentials \ --from-literal=cloud=aws \ --from-literal=aws-access-key-id=YOUR_KEY \ --from-literal=aws-secret-access-key=YOUR_SECRET \ -n veleroOption 2: Velero CLI
velero install \ --provider aws \ --plugins velero/velero-plugin-for-aws:v1.9.0 \ --bucket velero-backups \ --secret-file ./credentials \ --use-volume-snapshots=false \ --snapshot-location-config \ snapshotLocation=us-east-1Either way, Velero will spin up a Deployment and a restic DaemonSet (if using Restic for PV backups).
The Backup CRD: Making Your First Backup
Once Velero is running, backups are defined as Kubernetes resources. Here’s a full-cluster backup:
apiVersion: velero.io/v1kind: Backupmetadata:  name: daily-snapshot  namespace: velerospec:  includedNamespaces: ["*"]  excludedNamespaces: ["velero"]  # Exclude system namespaces if you want  # excludedNamespaces: ["kube-system", "kube-public", "velero"]
  # Include all resources except secrets (if you don't trust S3 encryption)  includedResources: ["*"]  excludedResources: ["events", "events.events.k8s.io"]
  # Include PV data  includedVolumes: ["*"]  excludedVolumes: ["cache-volume"]
  # Time-to-live before auto-deletion  ttl: "720h"
  # Run hooks before/after backup  hooks:    resources:      - name: my-db-quiesce        includedNamespaces: ["database"]        pre:          - exec:              container: postgres              command: ["/bin/sh", "-c", "pg_basebackup -D /tmp/backup"]
  # For CSI snapshots (requires CSI driver + VolumeSnapshotClass)  defaultVolumesToFsBackup: false  defaultVolumesToRestic: true  # Use Restic instead
  # Metadata labels for filtering  labels:    backup-type: "full-cluster"    frequency: "daily"
Apply it:
kubectl apply -f backup.yaml
# Watch it progresskubectl logs -n velero deployment/velero -f
# See the backup statusvelero backup describe daily-snapshotvelero backup logs daily-snapshot
BackupSchedule: Automating the Pain Away
Rather than manually creating backups, use a BackupSchedule:
apiVersion: velero.io/v1kind: BackupSchedulemetadata:  name: daily-full-backup  namespace: velerospec:  schedule: "0 2 * * *"  # 2 AM daily, cron syntax
  template:    includedNamespaces: ["*"]    excludedNamespaces: ["velero", "kube-system"]
    # Namespace-scoped backup (backup only one namespace)    # includedNamespaces: ["production"]
    includedResources: ["*"]    excludedResources: ["events"]
    ttl: "720h"  # Delete backups older than 30 days
    defaultVolumesToRestic: true
    labels:      schedule: "daily"
Velero will create Backup CRDs on the schedule and clean up old ones automatically.
Restore: Bringing It Back
When disaster strikes, restores are equally straightforward:
apiVersion: velero.io/v1kind: Restoremetadata:  name: restore-prod-db  namespace: velerospec:  backupName: daily-snapshot  # Which backup to restore
  # Restore only one namespace (common for partial recovery)  includedNamespaces: ["database"]  # includedNamespaces: ["*"]  # restore everything
  # Map namespace during restore (restore 'prod' backup into 'prod-restored')  namespaceMapping:    prod: prod-restored
  # Include/exclude resources  includedResources: ["*"]  excludedResources: ["events"]
  # Restore hooks (run after restore, e.g., schema migration)  hooks:    resources:      - name: migrate-after-restore        includedNamespaces: ["database"]        postRestore:          - exec:              container: postgres              command: ["/bin/sh", "-c", "psql -f /migrations/post-restore.sql"]
  # Don't restore persistent volumes (useful if reusing them from backup)  restorePVs: true
  # Preserve secrets (skip recreating Secret objects)  existingResourcePolicy: update  # or 'skip'
Restore via CLI:
velero restore create \  --from-backup daily-snapshot \  --include-namespaces "database" \  my-restore-job
# Watch itvelero restore describe my-restore-jobvelero restore logs my-restore-job
Restic vs. CSI Snapshots: The Data Layer Tradeoff
This is the gotcha that trips people up.
Restic (Universal, Slower)
- A node-agent (DaemonSet) mounts and backs up all PVs
- Works with any storage backend (NFS, local volumes, cloud-native storage)
- Stores data as encrypted objects in S3
- Slower: Reads every byte of every PV, compresses, uploads
- Reliable: Works everywhere
- Cost: Bandwidth to S3, compute for compression
CSI Snapshots (Fast, Storage-Specific)
- Uses your storage driver’s native snapshot capability (EBS, GCE persistent disks, Ceph RBD, etc.)
- Faster: Snapshots are near-instantaneous
- Tied to vendor: Restore only works with the same storage driver
- Cost: Storage snapshots (cheaper than Restic uploads)
Recommendation: For production, start with Restic. It’s slower but universal—you can restore to any cluster with any storage. Once you’re comfortable, migrate to CSI if your storage driver supports it.
Cross-Cluster Restore: The Real Win
Here’s why Velero matters. You’re running a single cluster. A node dies. The cluster controller gets corrupted. You lose quorum. You need a new cluster.
With Velero:
- Spin up a new Kubernetes cluster (same version or newer)
- Install Velero with the same S3 backend
- List the backups:
velero backup get - Restore:
velero restore create --from-backup daily-snapshot my-recovery - Watch resources come back:
kubectl get all -A
Your entire cluster is back, resources and all. That’s the entire point.
Encryption, Security, and Gotchas
Encryption
- S3 Server-Side: Use S3 bucket encryption (KMS or AES-256). Velero stores credentials in a Secret—this is in-cluster and thus encrypted by Kubernetes (depending on your etcd encryption)
- Restic: Can optionally encrypt with a password (
resticPasswordin Values) - Never store credentials in a ConfigMap — use Secrets
CRDs First, Then Resources
Velero restores in this order: Custom Resource Definitions → Cluster-scoped resources → Namespaced resources. If you have a CRD that other resources depend on, you need that CRD to exist first or the restore will fail silently. Velero handles this, but be aware.
Plugins for AWS/GCP/Azure
Velero has plugins for cloud-provider snapshots:
velero-plugin-for-aws→ EBS snapshotsvelero-plugin-for-gcp→ GCE persistent disk snapshotsvelero-plugin-for-microsoft-azure→ Azure managed disks
Install them as --plugins in your Helm values or CLI.
Secrets and ConfigMaps
Velero backs up Secrets and ConfigMaps as-is. If you don’t want Secret data in object storage, exclude them:
excludedResources: ["secrets"]You’ll need to restore those manually.
Namespace Deletion
Velero does NOT delete existing namespaces during restore. If you’re restoring a namespace that already exists, resources will merge (or conflict, depending on existingResourcePolicy). If you want a clean slate, delete the namespace first.
Real DR Runbook: Cluster is Burning
Your cluster just caught fire. Here’s the actual sequence:
Step 1: Spin Up a Fresh Cluster
# On your local machine, provision new infrastructure# (Terraform, Ansible, whatever you use)# Wait for cluster to be ready and kubeconfig accessibleStep 2: Install Velero
helm install velero vmware-tanzu/velero \ --namespace velero \ --create-namespace \ --values values-velero.yaml # Same S3 backend as productionStep 3: List Available Backups
velero backup get
# Output:# NAME                    STATUS      ERRORS   WARNINGS   CREATED# daily-snapshot          Completed   0        0          2026-06-24 02:00:00# daily-snapshot-2        Completed   0        0          2026-06-23 02:00:00
Step 4: Restore
velero restore create \  --from-backup daily-snapshot \  my-cluster-recovery
# Watch the logsvelero restore logs my-cluster-recovery
# Verify workloads are backkubectl get pods -Akubectl get svc -A
Step 5: Validate
# Check if your app is runningkubectl logs -n production deployment/my-app
# Connect to serviceskubectl port-forward -n production svc/my-db 5432:5432
# Run a sanity querypsql -h localhost -U dbuser -d mydb -c "SELECT COUNT(*) FROM users;"
Step 6: Update DNS/Ingress If your old cluster had a public IP, update DNS or the Ingress controller endpoint to point to the new cluster.
Step 7: Monitor
# Check Velero status for any warningsvelero restore describe my-cluster-recoveryThe whole process: 15–30 minutes, depending on your cluster size and backup upload speed.
Alternatives: Stash, Kasten K10, TrilioVault
- Stash (by AppsCodes): More enterprise, supports databases, helm releases, Istio configs. Paid.
- Kasten K10: Full-featured disaster recovery platform. Paid per node.
- TrilioVault: Specialized for application-aware backups. Expensive.
For self-hosters and small teams, Velero + MinIO (or S3) is unbeatable. Free, auditable, simple, and proven.
Monitoring and Alerts
Velero exposes Prometheus metrics:
# In-cluster, the Velero Prometheus metrics are at:# Useful metrics:# velero_backups_total# velero_backup_failure_total# velero_backup_duration_seconds# velero_restore_total# velero_restic_backup_errorsSet up Prometheus scraping and alert on:
velero_backup_failure_totalincreasing (backups failing)velero_restic_backup_errorsincreasing (volume backup errors)velero_backup_duration_secondsspiking (unusually slow backups)
The Bottom Line
Velero is boring infrastructure—exactly what you want. It does one job: capture cluster state and PV data, store it durably, and let you replay it on a fresh cluster. No surprises, no proprietary formats, no vendor lock-in.
Your cluster will fail. Drives will die. Bugs will slip through. But with Velero running and a BackupSchedule cranking out daily snapshots, you’re not 2 AM debugging—you’re spinning up a new cluster and restoring from yesterday.
That peace of mind is worth the 20 minutes of setup.