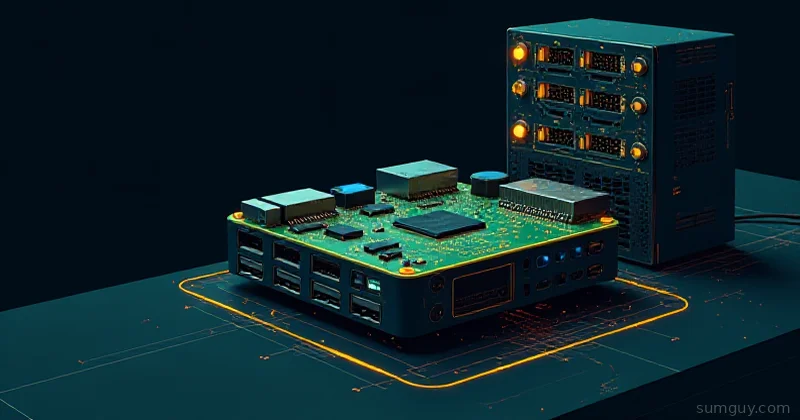
Your Server’s Default Settings Were Not Made For You
Out of the box, most server firmware assumes someone is sitting in front of it. A monitor. A keyboard. Maybe a KVM cart rolling down the aisle. That person is not you, because your server is in a basement rack, a colo, or under the stairs next to the Christmas decorations.
Default firmware settings are tuned for the floor of a server room with a full-time ops team. You’re running a homelab, maybe a small colo, maybe a five-node Proxmox cluster that you’ll be SSH-ing into from your couch at midnight. The defaults will bite you. Here’s what to change before you walk away.
This covers real settings, Dell iDRAC/RACADM, HP iLO, ASRock Rack, Supermicro IPMI. Wherever the UI path differs, I’ll say so. Let’s get into it.
Power Recovery: The Most Important Setting You’ve Never Changed
If your server loses power and comes back, from a breaker trip, a UPS failover, a utility blip, what happens? By default on most boards: nothing. It sits there, powered off, waiting for you to press the power button that is nowhere near you.
Fix it: Find AC Power Recovery (Dell), After Power Loss (Supermicro/ASRock Rack), or Power On After Power Failure (HP iLO). Set it to:
- Always On: boots unconditionally after power restores
- Last State: restores to whatever state it was in before the outage (running = boot, off = stay off)
For homelab servers, “Always On” is almost always what you want. You want the thing running.
On Dell via RACADM:
racadm -r idrac.lan -u root -p calvin set BIOS.SysSecurity.AcPwrRcvry AlwaysOnracadm -r idrac.lan -u root -p calvin jobqueue create BIOS.Setup.1-1On Supermicro, it’s under IPMI → Power Restore Policy in the web UI. On ASRock Rack it’s Advanced → ACPI Settings → Restore on AC Power Loss.
Set it. Forget about it. Sleep through the next storm.
Watchdog Timer: Because Sometimes Linux Just… Doesn’t
Hardware watchdog timers are one of those things that sound like overkill until the day your box locks up solid, kernel panic, runaway process, memory corruption, and you’re watching the monitoring dashboard go flat from 200 miles away.
The watchdog timer kicks the machine if the OS stops petting it. Your OS should be configured to pet it regularly; if it stops, the watchdog reboots the box.
In BIOS: Look for OS Watchdog Timer (Dell), Watchdog Timer (Supermicro), or Intel Watchdog Timer (ASRock Rack). Enable it. Set timeout to something reasonable, 5 to 10 minutes.
In Linux: systemd ships with a watchdog interface. Enable it in /etc/systemd/system.conf:
[Manager]RuntimeWatchdogSec=60RebootWatchdogSec=10minOr use the kernel’s softdog module as a software fallback:
echo 'softdog' | sudo tee /etc/modules-load.d/softdog.confmodprobe softdogPair this with watchdog daemon if you want fancier checks. Either way, the combination of hardware watchdog + OS watchdog means a wedged box recovers itself instead of waiting for you.
Wake-on-LAN: Because You Might Want to Save Power Sometimes
Wake-on-LAN lets you boot a powered-off machine over the network. Useful if you’re actually powering down boxes to save electricity, or if AC power recovery isn’t enough and you need manual trigger.
In BIOS: Wake on LAN under NIC settings or power management. Make sure you’re enabling it on the right port, on servers with multiple NICs, it’s usually the dedicated management NIC or LOM port 1. Check your network topology before assuming.
In Linux, persist WOL across reboots:
# Check current WOL stateethtool eth0 | grep Wake-on
# Enable magic packet WOLsudo ethtool -s eth0 wol g
That doesn’t survive a reboot. Use a systemd service to make it stick:
[Unit]Description=Wake-on-LAN for %iAfter=network.target
[Service]Type=oneshotExecStart=/sbin/ethtool -s %i wol gRemainAfterExit=yes
[Install]WantedBy=multi-user.targetEOF
sudo systemctl enable --now wol@eth0To send a magic packet from another machine:
wakeonlan aa:bb:cc:dd:ee:ff# oretherwake -i eth0 aa:bb:cc:dd:ee:ffConsole Redirection and Serial Over LAN
This one’s a big deal. When your server kernel panics, you want to see the output. Not after the fact in a log, you want it live on the BMC serial console so you can actually diagnose what happened.
In BIOS: Find Serial Port Configuration or Console Redirection. Set:
- Baud rate:
115200 - Data bits:
8 - Parity:
None - Stop bits:
1 - That’s
115200,8N1: standard everywhere
Also enable SOL (Serial Over LAN) in your BMC settings so you can access this remotely.
In GRUB: Edit /etc/default/grub to redirect the kernel console:
GRUB_CMDLINE_LINUX="console=ttyS1,115200n8 console=tty0"GRUB_TERMINAL="console serial"GRUB_SERIAL_COMMAND="serial --unit=1 --speed=115200 --word=8 --parity=no --stop=1"Note: ttyS1 is typically the second serial port (used by Dell iDRAC). Supermicro often uses ttyS0. Check dmesg | grep tty to confirm which one your BMC is wired to. Then:
sudo update-grub# or on RHEL/Rocky:sudo grub2-mkconfig -o /boot/grub2/grub.cfgConnect to SOL remotely:
ipmitool -I lanplus -H idrac.lan -U root -P calvin sol activateOr, after SSH-ing into the iDRAC, connect to the serial console directly:
# then at the iDRAC prompt:console com2Now when your box panics at 3 AM, you can connect to the BMC from your laptop and see the full kernel oops instead of staring at a monitoring alert that just says “host unreachable.”
PXE and Network Boot Priority
If you’re running iPXE, Matchbox, Talos, or anything that boots over the network, make sure network boot is first in the boot order. Also make sure you’re PXE booting from the right NIC.
In most BIOS UIs: Boot → Boot Option Priorities → Network Boot. Move it above SATA/NVMe.
If you’re not doing network boot, push it to the bottom. Having PXE first on a box with local storage means a 60-second timeout on every boot when your DHCP server doesn’t respond. That adds up over time, and it’s incredibly annoying when you’re trying to diagnose why a box took 3 minutes to come back online.
Fan Curves: Your Neighbors Will Thank You
Default server fan profiles are set for “we must never let this thing overheat under any circumstances.” The result is jet-engine noise from a Supermicro box in your basement at 2 AM.
Most BMCs let you set a fan profile:
- Performance: loud, fast, runs hot nonstop
- Acoustic / Low Power: quieter, slower ramp, fine for most home lab workloads
- Custom: you set the thresholds
On Supermicro IPMI web UI: Configuration → Fan Mode. Switch from “Full Speed” to “Optimal Speed” or “PUE2 Optimized.” It’s a world of difference.
On Dell iDRAC, you can set fan speeds via RACADM or ipmitool:
# Enable manual fan control (Dell specific)ipmitool -I lanplus -H idrac.lan -U root -P calvin raw 0x30 0x30 0x01 0x00# Set fan speed to 20% (hex 0x14)ipmitool -I lanplus -H idrac.lan -U root -P calvin raw 0x30 0x30 0x02 0xff 0x14Don’t leave it on 100% unless you’re running a compute cluster that legitimately needs it.
C-States, P-States, and Turbo Boost
The right answer depends entirely on your workload.
For always-on services (Postgres, Prometheus, production-ish workloads):
Disable deep C-states (C6/C7) in BIOS. Look for Package C-State or CPU Power Management → C States and set to C1 or C1E max. Enable Turbo Boost. Set the BIOS System Profile (Dell) or Power Profile (Supermicro) to Performance Optimized.
Then pin the CPU governor in Linux:
sudo cpupower frequency-set -g performanceOr persist it:
echo 'GOVERNOR=performance' | sudo tee /etc/default/cpupowersudo systemctl enable --now cpupowerFor an idle homelab box that’s mostly waiting around:
Leave C-states enabled. Set governor to powersave. Your idle power draw will drop meaningfully, especially on older Xeon platforms.
sudo cpupower frequency-set -g powersaveDell via RACADM:
racadm -r idrac.lan -u root -p calvin set BIOS.SysProfileSettings.SysProfile PerfOptimizedHyper-Threading, SR-IOV, and Virtualization Flags
Quick rundown:
Hyper-Threading: Leave it on in 2026. The Spectre/L1TF mitigations are mature, and the throughput benefit outweighs the risk for a homelab. Only turn it off if you’re running a high-security multi-tenant setup (you’re not).
VT-d / AMD-Vi (IOMMU): Must be enabled for PCIe passthrough in Proxmox, KVM, or any Type-1 hypervisor setup. Look for Intel VT-d or AMD IOMMU in Chipset/Advanced settings. Enable it. Also add to your kernel cmdline:
# IntelGRUB_CMDLINE_LINUX="intel_iommu=on iommu=pt"# AMDGRUB_CMDLINE_LINUX="amd_iommu=on iommu=pt"SR-IOV: If you have a NIC that supports it (Intel X550, X710, Mellanox ConnectX series), enable SR-IOV in BIOS under PCI Configuration → SR-IOV. This lets you slice physical NICs into virtual functions for VMs, very useful for high-throughput workloads.
Secure Boot, CSM, and the UEFI Maze
Secure Boot: Disable it. Honestly, unless you’re running a cloud provider or enterprise fleet, Secure Boot just creates friction with ZFS-on-Linux, custom kernels, Talos OS, and anything that needs unsigned modules. Check the current state with:
mokutil --sb-stateIf you’re on an OS that properly supports Secure Boot (Ubuntu with signed DKMS modules), you can leave it on. But if you hit module loading failures, this is the first thing to check.
CSM (Compatibility Support Module): Disable it on modern setups. CSM provides legacy BIOS emulation for old OSes. If you’re running Talos, Rocky Linux, Ubuntu 22.04+, or anything installed in UEFI mode, CSM is noise. Disable it under Boot → CSM Configuration. Also check your disk partitioning: you need a GPT partition table and an EFI System Partition (ESP) to boot UEFI-only.
The Small Things That Will Ruin Your Night
NumLock on boot: If your LUKS passphrase or BMC password has numbers in it and NumLock is off, you’re typing blind characters over SOL. Check Boot → Numlock Status and set to On.
POST Splash Screen: Disable it. The vendor logo screen delays the POST output from showing on the serial console. You want to see what’s happening, not a logo. Find Boot → Quiet Boot or POST Behavior → Dell Fast Boot and disable.
Boot Delay: Some boards have a user-configurable boot delay (5 to 15 seconds) so you can “press a key to enter setup.” Drop it to 1 second or zero. You have IPMI/iDRAC/iLO to get into setup remotely anyway.
BMC/iDRAC/iLO Baseline Config
Before anything else, the BMC itself needs to be sane:
-
Dedicated management NIC: Use the dedicated IPMI/iDRAC/iLO port, not a shared LOM. Shared mode means your management traffic competes with your data plane and disappears if the OS crashes the NIC driver.
-
Static IP: Never leave the BMC on DHCP. Set a static IP on your management VLAN. Write it down. Tattoo it on your arm if necessary.
-
Change the default password:
calvinfor Dell,Adminfor Supermicro,Administratorfor HP iLO. These are publicly known. Change them before the box touches a network. -
Disable IPMI over LAN if you don’t need it: IPMI v2 has known vulnerabilities. If you’re only using the web UI and SOL, disable raw IPMI LAN access in the BMC settings.
Check basic DMI/BIOS info from Linux:
sudo dmidecode -t biossudo dmidecode -t systemThis gives you firmware version, release date, and system serial number, useful when filing support tickets or checking if a firmware update applies.
ECC Memory and EDAC Reporting
If your server has ECC RAM (it should, buy ECC hardware for servers), make sure ECC is enabled in BIOS under Memory Configuration → ECC Mode. Set it to Multi Bit ECC or SDDC (Single Device Data Correction) depending on what your platform supports.
Then verify Linux is actually reporting ECC events:
ls /sys/devices/system/edac/mc/cat /sys/devices/system/edac/mc/mc0/ce_count # correctable errorscat /sys/devices/system/edac/mc/mc0/ue_count # uncorrectable errors (bad)If those files don’t exist, you may need to load the EDAC module for your CPU:
modprobe sb_edac # Sandy/Ivy Bridge Xeonmodprobe skx_edac # Skylake XeonA non-zero ue_count means you have a failing DIMM. Replace it before it takes down a VM at the worst possible time.
The Bottom Line
None of this is glamorous work. You do it once, you document it (at least in a sticky note on the chassis), and then you forget about it. Until the day power blips and your server comes back up on its own. Until the day a kernel panic shows up beautifully formatted on your IPMI serial console instead of being unknowable. Until the day your fan-controlled server quietly ticks away in the basement instead of waking up your household.
Quick checklist before you rack:
- AC Power Recovery → Always On
- OS Watchdog → Enabled
- Console Redirection → 115200,8N1 + GRUB
console=ttyS1,115200n8 - SOL → Enabled on BMC
- Boot order → Right order for your use case
- Fan profile → Not “Full Speed”
- C-States → Appropriate for workload
- VT-d/AMD-Vi → On (Proxmox/KVM)
- Secure Boot → Off (unless you need it)
- CSM → Off (UEFI-only OS)
- NumLock → On
- POST Splash → Disabled
- BMC → Static IP, changed password, dedicated NIC
Spend 30 minutes on this before you rack the box. Your future self, the one who’s trying to debug a kernel panic from a coffee shop at 11 PM, will owe you a drink.