Your Rack Is a Crime Scene
You know the feeling. You need to add one more device to the switch. You reach behind the rack, grab what looks like the right cable, and pull. Three things unplug. A Pi goes dark. The dog startles. Somewhere, a dashboard turns red.
This is the tax you pay for unstructured cabling. Every “temporary” cable you ran directly from device to switch is a debt accruing interest — and it gets called in at the worst possible time.
The fix isn’t expensive gear. It’s a patch panel, some planning, and one afternoon of actual work. Here’s how to do it right.
Why Bother With a Patch Panel at All
Short answer: short cables get touched, long cables don’t.
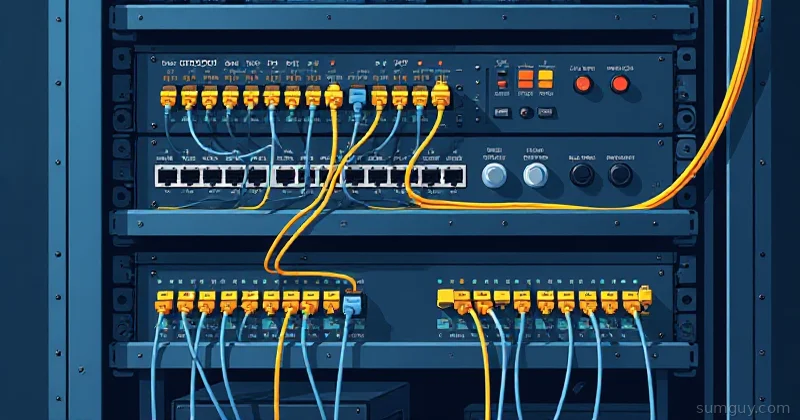
The idea is simple. Your structured runs — the cables going from wall plates, ceiling APs, or conduit to the rack — are permanent. You punch them down once into a patch panel, test them, and forget they exist. They never move. They live behind walls or under floors, undisturbed.
Then between the patch panel and your switch, you use short 1–3 ft patch cables. These are the ones you swap when you reconfigure something. They’re cheap, replaceable, and clearly labeled.
Benefits you’ll actually feel:
- Zero “is it the cable?” debugging — structured runs are tested once and trusted
- Easy reconfigs — moving a device means moving one patch cable, not tracing a 25-ft run into a spaghetti mess
- Cleaner airflow — shorter cables mean better rack airflow, which matters when you’re packing 2U servers in there
- Documentation that stays accurate — when every port is labeled, your Netbox actually matches reality
Your 2 AM self will thank you. Profusely.
Picking Your Cable: Cat6 vs Cat6a vs “Why Does Cat8 Exist”
For a home lab, you have two real choices:
Cat6 — supports 1G easily and 10G up to about 55 meters (in practice, your runs are probably under 20m, so you’re fine). Thinner, easier to punch down, cheaper. Standard choice for 90% of home builds.
Cat6a — supports 10G to 100 meters, better alien crosstalk rejection. The cable is noticeably thicker and stiffer. Worth it if you’re pulling cables you never want to touch again and you’re building for 10G now or soon. The extra cost per run is real but not insane.
Cat7 / Cat8 — overkill. Cat7 uses a non-standard connector spec, and Cat8 is designed for short data center runs (up to 30m). Unless you’re running 40G between servers 2 feet apart, skip it. It’s the equivalent of buying a formula 1 car to drive to the grocery store.
Shielded (STP) vs Unshielded (UTP)
Home lab default: UTP. It’s simpler, cheaper, and forgiving.
STP (shielded twisted pair) is worth considering if you’re running cables near fluorescent lighting ballasts, motors, or other serious RF sources. The catch: if you use STP, the shield needs to be grounded — both ends — or it becomes an antenna that makes things worse. Half-measure STP is worse than UTP. Full-commit or skip it.
Keystone vs Punchdown Panels
Two panel styles:
- Keystone panels — the panel is a blank faceplate with slots, and you snap in individual keystone jacks. Flexible: you can mix Cat6 and Cat6a ports, or swap a jack if it dies. Slightly more upfront work per port.
- Integrated punchdown panels — ports are built in, you punch directly onto the panel’s IDC contacts. Faster, less fiddly, marginally less flexible.
For a home build where you’re not adding/changing port types often, integrated punchdown panels are slightly cleaner. For flexibility, keystone wins. Pick based on whether you value speed of install or long-term reconfigurability.
Tools You Actually Need
Don’t let tool lists scare you. You need four things:
Punch-down tool — the thing that seats the wire into the IDC contact and cuts the excess. Get one with both 110 and Krone blade. The 110 blade is what you’ll use (that’s the North American standard for most patch panels). Impact-style tools are faster and more consistent than the spring-loaded cheapies. A decent one is $20–35.
Cable tester — non-negotiable. Bare minimum: a wiremap tester like the Klein VDV501-851 ($50). It confirms wire order and continuity but doesn’t test actual link quality. A step up: a Pockethernet ($150) gives you wiremap plus length, speed grade estimation, and PoE detection. If you’re serious about 10G validation, a Fluke LinkIQ or equivalent is the right tool but costs real money — most home labbers borrow one or find a “Linkrunner cheap clone” on eBay that gets you 80% of the value.
Label printer — the Brother PT-D610BT pairs to your phone. The Brady line is more durable but costs more. Either way: label every cable, both ends, before you close anything up. This is the discipline that separates people who are still sane five years later from people who are guessing.
Velcro ties, not zip ties — velcro is reversible. Zip ties mean you’re cutting when you change anything. Use velcro straps for bundles, zip ties only where something absolutely must not move (like a PDU cable going to a wall outlet). Cable combs help dress patch cables neatly if you care about the aesthetic.
Optional but nice: 1U brush plates at the bottom of the rack for where cables exit toward the floor. They reduce dust ingress and look intentional.
Rack Topology: Where Everything Goes
The golden rule: structured runs enter from the top (or from a dedicated cable management unit), terminate at the patch panel, and then short cables run down to the active gear.
A sensible vertical layout for a typical home rack:
┌──────────────────────────────────────┐│ 1U Patch Panel (24-48 port) │ ← structured runs land here│ 1U Cable Management (ring/brush) ││ 1U Core Switch (10G uplink) │ ← short patch cables from panel│ 1U Access Switch (1G PoE for APs) ││ 1U Firewall / Router ││ 1U Cable Management ││ 2U Server 1 ││ 2U Server 2 ││ 1U NAS / Storage ││ 1U Pi/OOB management ││ 1U Cable Management ││ 2U UPS │ ← bottom, heavy└──────────────────────────────────────┘ [PDU mounted vertically on rear]Active gear in the middle where you work. UPS at the bottom for center-of-gravity reasons (you don’t want a 40-lb battery at the top of a free-standing rack). PDU on the rear vertical rail.
The principle: patch panel top, UPS bottom, everything else sorted by dependency. Firewall before switches (logically upstream), switches before servers.
Punching Down Cat6a: Step by Step
This is the part that sounds scary and isn’t. T568B is the standard for new installs (T568A exists for legacy reasons — use B unless you have a specific reason not to).
T568B wiring order (left to right, looking at the front of the keystone):
Pin 1: White/OrangePin 2: OrangePin 3: White/GreenPin 4: BluePin 5: White/BluePin 6: GreenPin 7: White/BrownPin 8: BrownThe pairs are: Orange (1-2), Green (3-6), Blue (4-5), Brown (7-8).
The process:
- Strip roughly 1 inch of jacket — no more. Cat6a is thick, use a proper cable stripper, not a knife (you nick conductors and create intermittent failures you’ll debug for hours).
- Separate the pairs, but do not untwist past the jacket line. The twist is what rejects crosstalk. Untwisting more than about 13mm (half an inch) for Cat6/6a kills your 10G performance potential.
- Lay the pairs into the IDC slots in T568B order. The punch-down tool diagram on the keystone or panel usually shows which slot is which — follow it, don’t guess.
- Set your punch-down tool to “cut” mode (most have a high/low impact and a blade position). Impact the wire down, the tool seats the conductor and cuts the excess tail in one motion.
- Repeat for all 8 conductors.
- Snap the keystone into the panel faceplate. Done.
Common errors: stripping too much jacket, untwisting too much, using mismatched standards (T568A on one end, T568B on the other — this creates a crossover cable, which you almost certainly don’t want for a wall run).
Labeling: Do It Now or Regret It Forever
Every cable gets labeled both ends before you close anything up. No exceptions. The label you skip is the one you need to trace at 11 PM.
A usable scheme:
Panel port → Wall plate locationExample: P01-A → WP-OFFICE-A P01-B → WP-OFFICE-B P02-A → AP-HALLWAYThe “P01” refers to patch panel port 01. “WP” is wall plate. Log it in a spreadsheet at minimum. If you want to do it properly, put it in Netbox — there’s a self-hosted Docker Compose setup that takes about 20 minutes and makes you feel unreasonably professional.
Patch cables between panel and switch get labeled at the panel end with the device name. Switch port labeling goes into your switch config or Netbox. The goal: you should be able to identify any cable in your rack without pulling it.
Testing: Trust But Verify
After punching down, test before you close the cable run or route patch cables.
Wiremap test — plug both ends of the cable into your tester. It confirms:
- All 8 pins connected
- No shorts between pairs
- No split pairs (wiring error where you’ve split a twisted pair across pins — kills performance at speed)
A split pair passes a basic continuity test but fails at anything over 100M. The wiremap tester catches it.
Speed validation — after everything’s live, confirm your negotiated speed:
cat /sys/class/net/eth0/speedShould return 10000 for 10G, 2500 for 2.5G, 1000 for 1G. If you expected 10G and got 1G, you have a cable issue, a negotiation issue, or a NIC that doesn’t support 10G (check with ethtool eth0).
Throughput test — don’t trust negotiated speed alone. Run iperf3 to validate actual throughput:
# On the server (receiver):iperf3 -s
# On the client (sender):iperf3 -c 192.168.1.10 -t 30 -P 4
The -P 4 flag runs 4 parallel streams, which is more representative of real workloads than a single stream. On a clean 10G link you should see 9.4–9.8 Gbps. Under 8G warrants investigation. Under 5G means something is wrong (cable, SFP, NIC settings).
Cable diagnostics — most network cards support a cable test via ethtool:
ethtool -t eth0 offlineThis runs the NIC’s built-in cable diagnostics and can detect open pairs, shorts, and impedance mismatches at the physical layer. Not all NICs support it, but Intel and Broadcom cards usually do.
Power Side: PDU and UPS
Don’t neglect the power. Two things matter:
PDU (Power Distribution Unit) — at minimum, get a horizontal PDU with more outlets than you think you need (you’ll fill them). A metered PDU adds per-outlet current monitoring, which is useful for knowing whether you’re actually drawing what you think. An ATS PDU (Automatic Transfer Switch) has two inputs and switches between them — useful if you have two UPS units or a generator. For most home labs: a basic horizontal PDU is fine unless you’re running redundant power supplies.
UPS sizing — use watts, not VA (volt-amps). VA rating is always higher than watt rating. Find the actual watt draw of your gear (use a kill-a-watt meter) and target 150–200% coverage so the UPS isn’t running at capacity all the time.
Runtime calculation is simple: a 1500VA/900W UPS with a 200W load gives you roughly 30–45 minutes of runtime depending on battery condition. Size for how long you need to either gracefully shut down or survive a brief outage.
A UPS without network management is a missed opportunity — get one with a USB or network management card so your servers can query runtime and initiate clean shutdowns before the battery dies.
The Mistakes Everyone Makes Once
- Over-stripping the jacket — 1 inch max. More jacket stripped means more untwisted conductor exposed.
- Untwisting pairs too far from the punch point — keep twist as close to the IDC contact as physically possible.
- Mixing T568A and T568B — pick one per install, use it everywhere. Mixing creates crossover cables accidentally.
- Not testing before closing the wall — test the run before you patch it, not after you’ve drywall-mudded the box.
- Skipping labels — future you will be furious at present you.
- Running unshielded STP — either commit to proper STP with grounded terminations on both ends, or just use UTP.
- Flat/ribbon patch cables — they look clean but their crosstalk rejection is terrible. Use round, stranded patch cables.
Should You Bother?
If your rack has fewer than four runs and you’re not planning to expand: probably not. A well-labeled direct connection is fine at that scale.
But if you have six or more runs, you’re running 2.5G or 10G, you ever want to reconfigure without a treasure hunt, or you’ve already lived through the “which cable is this” moment — yes. Absolutely bother.
A 24-port patch panel is $30–50. A punch-down tool is $25. A wiremap tester is $50. One afternoon of work. That’s the cost of never playing cable archaeology again.
The first time you need to move a device and it’s a one-cable swap instead of a 30-minute detangle session, you’ll feel absurdly smug about it. That smugness is earned.
The Bottom Line
Patch panels are not enterprise overkill. They’re a $75 investment in your future sanity. Structure your cabling once, label everything, test before closing runs, and use short patch cables between the panel and your switch. That’s the whole thing.
Your rack won’t be a crime scene anymore. And your 2 AM self — who just needs to swap one server without triggering a cascading unplug disaster — will finally catch a break.