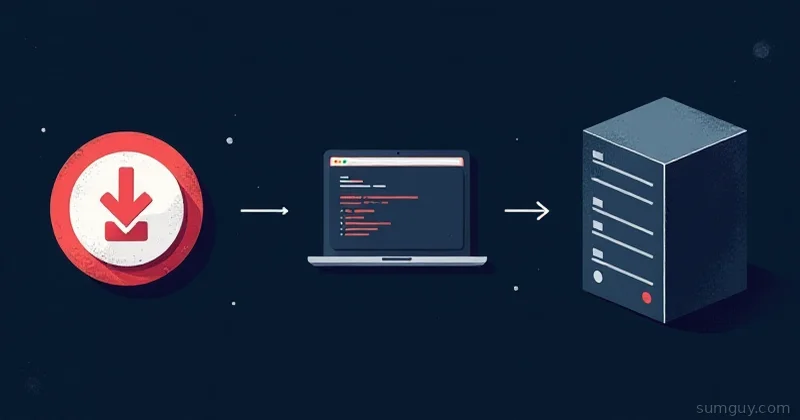

You built a VM by hand, installed your usual packages, and converted it to a template. Three months later the template is stale, nobody remembers what went into it, and “clone it and fix it up” has become a ritual. Now you want a template you can rebuild without guessing.
Proxmox gives you two honest ways out. You can grab a vendor cloud image, wrap it in a cloud-init drive, and let each clone personalize itself on first boot. Or you can use Packer to build the template from code, the same way every time.
My verdict: start with the cloud image and cloud-init. It takes ten minutes, needs no extra tooling, and covers most homelabs. Reach for Packer when you must bake packages or hardening into the image, when you need an auditable rebuild, or when the OS has no cloud image (Windows, mostly). The two also stack: Packer can build on top of a cloud-init template, and that combination is the one I would use past a handful of VMs.
Everything below was written from the official docs and not run. I checked it against the Proxmox VE 9.2 documentation and Packer plugin hashicorp/proxmox v1.2.4 (released July 2026). Test it on a throwaway node before you trust it. Where I could not confirm something, I say so.
Method A: Cloud Image Plus cloud-init
A cloud image is a small, prebuilt disk with cloud-init inside. On first boot, cloud-init reads a config drive and sets the hostname, user, SSH keys, and network. Proxmox generates that drive for you from the VM’s settings.
You build the template once. Every clone then gets its own identity from the Cloud-Init tab in the UI or from qm set.
Build the template
This follows the Proxmox cloud-init wiki page, using the current Ubuntu 24.04 (noble) image. VMID 9000 and local-lvm are placeholders. Change them to match your node.
# on the Proxmox node (pve1)wget https://cloud-images.ubuntu.com/noble/current/noble-server-cloudimg-amd64.img
# create the VM shell with a VirtIO SCSI controllerqm create 9000 --name ubuntu-2404-ci --memory 2048 --cores 2 \  --net0 virtio,bridge=vmbr0 --scsihw virtio-scsi-pci
# import the image as the boot diskqm set 9000 --scsi0 local-lvm:0,import-from=/root/noble-server-cloudimg-amd64.img
# add the cloud-init drive, boot only from the disk, use a serial consoleqm set 9000 --ide2 local-lvm:cloudinitqm set 9000 --boot order=scsi0qm set 9000 --serial0 socket --vga serial0
# turn on the guest agent flag (the package comes later)qm set 9000 --agent 1
# make it a templateqm template 9000
A few notes on that block:
import-fromis the documented way to attach a downloaded image in current Proxmox VE. The olderqm importdiskstill works, but it needs a second step to attach the resulting volume.- The wiki says Ubuntu cloud images require the
virtio-scsi-pcicontroller, which is why--scsihwis set on the create line. - The Ubuntu image ships with a small virtual disk. Resize the clone, not the template, with
qm disk resize <clone-id> scsi0 +18G. A template you have not resized gives you a 3 GB root disk and a bad afternoon. - The
--agent 1flag only tells Proxmox to expose the agent channel. The guest still needsqemu-guest-agentinstalled. More on that below.
Clone and personalize
qm clone 9000 123 --name web01 --fullqm set 123 --ciuser deploy --sshkeys ~/.ssh/id_ed25519.pubqm set 123 --ipconfig0 ip=10.0.0.123/24,gw=10.0.0.1qm start 123ciuser replaces the image’s default user for key and password setup. ipconfig0 takes a CIDR address and gateway, or the string dhcp. If you set no address at all, Proxmox defaults to DHCP on IPv4. The wiki example writes --sshkey, but the real option is --sshkeys, which takes a path to a public key file.
The wiki says to avoid cipassword, since SSH keys are the better default. I agree. Also note ciupgrade defaults to on, so each clone runs a package upgrade on first boot. That is good for security and bad for a clone that must be reachable in 10 seconds. Set --ciupgrade 0 if you care.
A linked clone is faster to create, but it depends on the template disk. A full clone copies the disk and lives on its own. For anything you plan to keep, use a full clone.
Snippets and vendor-data
The generated config is fine for users, keys, and IPs. For anything else, such as installing a package on every clone, use cicustom. Proxmox accepts user, network, meta, and vendor files:
cicustom: [meta=<volume>] [,network=<volume>] [,user=<volume>] [,vendor=<volume>]The files must live on storage that has the Snippets content type enabled, and on every node the VM could migrate to. Otherwise the VM refuses to start. To enable snippets on the local directory storage:
pvesm set local --content iso,vztmpl,backup,snippetsCheck your existing content list first (Datacenter, Storage in the UI), because --content replaces the whole list.
Why vendor-data and not user-data? If you override user, you replace what Proxmox generates from ciuser and sshkeys, and you take over that whole job. A vendor file leaves the generated user-data alone and adds your layer on top. Here is a vendor file that installs the guest agent:
#cloud-configpackages: - qemu-guest-agentruncmd: - systemctl enable --now qemu-guest-agentAttach it to the template so every clone inherits it:
qm set 9000 --cicustom "vendor=local:snippets/vendor-agent.yaml"Want a base to edit? Dump what Proxmox generates with qm cloudinit dump 123 user (the same works for network and meta).
The guest agent trap
Ubuntu cloud images do not include qemu-guest-agent. Without it, qm shutdown falls back to ACPI, the UI shows no IP, and qm agent commands fail. Packer’s Proxmox builders also default qemu_agent to true, so a template without the agent leaves Packer waiting for an IP that never arrives.
You have two fixes for the cloud-init template. The vendor snippet above installs it on first boot of each clone, which needs network access at that moment. The other option is baking it into the image before import, using virt-customize -a noble-server-cloudimg-amd64.img --install qemu-guest-agent from the libguestfs-tools package. I have not run that here, but it is the standard tool for this job. Baking it in is the sturdier choice, and it is also your first step toward Packer.
Updating the template
Cloud-init has one weak spot. The template never changes unless you rebuild it. The image on disk is whatever you downloaded that day. Clones upgrade themselves on first boot, so security patches arrive, but the template gets slower to clone and boot as the gap grows. A rebuild means repeating the commands above with a new image and a new VMID, then pointing your clone scripts at it. A short shell script handles this, and in a homelab that is usually enough.
Method B: Packer
Packer builds the template from a description in a file. You commit the file, run packer build, and get the same template next time. The Proxmox plugin offers two builders:
proxmox-isoboots an installer ISO, types the boot command, feeds it an autoinstall or preseed file, and converts the result to a template.proxmox-cloneclones an existing VM or template, runs your provisioners, and converts the result into a new template.
The proxmox-clone docs say it “does not manage templates”: once the template exists, you use it or delete it. Old versions pile up until you prune them.
Plugin and API token
Install the plugin by declaring it and running packer init .:
packer { required_plugins { proxmox = { version = "~> 1" source = "github.com/hashicorp/proxmox" } }}The builder authenticates with a user plus API token. The plugin docs say the username field needs the token ID after an exclamation mark, such as user@pve!tokenid. The plugin docs I read did not list the Proxmox privileges the builders need, so the role below is my own starting set. I took it from the Proxmox privilege reference and matched it to what the builders do: create, configure, clone, and start VMs, allocate disk, and upload ISOs. Trim it by testing.
pveum role add PackerBuild --privs "VM.Allocate VM.Audit VM.Clone VM.PowerMgmt \ VM.Config.CDROM VM.Config.CPU VM.Config.Cloudinit VM.Config.Disk \ VM.Config.HWType VM.Config.Memory VM.Config.Network VM.Config.Options \ VM.GuestAgent.Audit Datastore.AllocateSpace Datastore.AllocateTemplate \ Datastore.Audit Sys.Audit SDN.Use"pveum user add packer@pvepveum acl modify / --roles PackerBuild --users packer@pvepveum user token add packer@pve build --privsep 0--privsep 0 means the token inherits the user’s permissions, so one ACL covers both. The last command prints the secret once. Store it in an environment variable such as PROXMOX_TOKEN, which the plugin reads, and never in the repo. Scope the ACL path to /vms, a pool, and the specific storages once it works. Granting on / is the lazy version.
proxmox-clone on top of a cloud-init template
This is the setup I would actually run. The base is the cloud-init template from Method A (with the guest agent in it). Packer clones it, installs your baseline, cleans up, and saves a new template.
variable "pve_token" {  type      = string  sensitive = true}
source "proxmox-clone" "ubuntu" {  proxmox_url              = "https://pve1.example.lan:8006/api2/json"  username                 = "packer@pve!build"  token                    = var.pve_token  insecure_skip_tls_verify = true  node                     = "pve1"
  clone_vm_id = 9000  vm_id       = 9100  vm_name     = "ubuntu-2404-baked-build"
  template_name        = "ubuntu-2404-baked"  template_description = "Built by Packer"
  cores  = 2  memory = 2048
  qemu_agent              = true  cloud_init              = true  cloud_init_storage_pool = "local-lvm"
  ssh_username = "ubuntu"}
build {  sources = ["source.proxmox-clone.ubuntu"]
  provisioner "shell" {    inline = [      "cloud-init status --wait",      "sudo apt-get update",      "sudo apt-get install -y fail2ban unattended-upgrades curl",      "sudo cloud-init clean --logs --machine-id",    ]  }}
What each key does, per the builder reference:
clone_vm_id(orclone_vmby name) picks the source. You need one of them.vm_idbecomes the ID of the final template. Leave it out and Packer takes the next free ID.cloud_init = trueadds an empty cloud-init drive after conversion, andcloud_init_storage_poolpicks where it lives.qemu_agentdefaults to true. Packer uses the agent to find the VM’s IP, so the agent must be in the guest.insecure_skip_tls_verifyis there because the node most likely has a self-signed certificate. Fix the certificate when you can.
The docs say that with no communicator defined, the builder generates an SSH key and sets it through the image’s cloud-init settings. I set ssh_username here for the Ubuntu default user. I could not confirm from the docs how the generated key and an explicit ssh_username interact, so check the first build log. If SSH auth fails, that is where I would look first. Also note that cloud-init clean does not remove the key Packer injected, so delete it from ~/.ssh/authorized_keys in the last provisioner step.
The cloud-init status --wait line matters. Packer connects while cloud-init is still finishing its first boot, and a running apt lock will fail your install. The final command gives clones fresh identities: cloud-init clean makes cloud-init run again on the next boot, and --machine-id resets the machine ID so clones do not share one.
proxmox-iso for everything else
When no cloud image exists, you use proxmox-iso. Windows is the common case. So is any hardened or custom Linux install you want from the vendor ISO. The shape is different:
source "proxmox-iso" "ubuntu" {  proxmox_url = "https://pve1.example.lan:8006/api2/json"  username    = "packer@pve!build"  token       = var.pve_token  node        = "pve1"
  boot_iso {    type         = "scsi"    iso_file     = "local:iso/ubuntu-24.04-live-server-amd64.iso"    iso_checksum = "sha256:<checksum from the Ubuntu release page>"    unmount      = true  }
  scsi_controller = "virtio-scsi-single"  qemu_agent      = true
  disks {    type         = "scsi"    disk_size    = "20G"    storage_pool = "local-lvm"  }
  network_adapters {    model  = "virtio"    bridge = "vmbr0"  }
  http_directory = "http"  boot_wait      = "10s"  boot_command   = ["<wait>... installer keystrokes go here ..."]
  ssh_username = "ubuntu"  ssh_timeout  = "30m"}
The block and key names above (boot_iso, iso_file, unmount, disks, network_adapters, http_directory, boot_wait, boot_command) match the builder reference. The boot_command is a placeholder on purpose. The right keystrokes depend on the installer version and your autoinstall file, so copy a known-good one for your ISO rather than trusting mine. Setting cd_files with cd_label = "cidata" is the documented way to hand an Ubuntu autoinstall its user-data and meta-data on a CD.
This path is slow and fragile. You are typing into a boot menu over a network. A new ISO point release can break the keystrokes.
Time Costs
These are rough figures from how the steps behave, not benchmarks.
- Cloud image, first time: about ten minutes, most of it reading the wiki. After that, a new template takes a couple of minutes plus the download.
- Packer clone, first time: an hour or two for the token, plugin, HCL, and the first failed SSH connection. Later rebuilds are a few minutes, and you can run them on a schedule.
- Packer ISO, first time: an afternoon. The install itself takes 10 to 20 minutes, but tuning
boot_commandtakes longer.
Which One Do You Pick?
| Need | Pick |
|---|---|
| A few Linux VMs, per-clone user, key, IP | Cloud image + cloud-init |
| Same packages and hardening on every VM | Packer proxmox-clone |
| Auditable, reviewable, repeatable rebuild | Packer |
| Windows or a distro with no cloud image | Packer proxmox-iso |
| Fast per-VM setup on first boot | cloud-init |
The split is clean. Packer decides what is in the template. cloud-init decides what is different about each clone. Mix those jobs and you end up fighting both: hostnames baked into a template, or fifty packages installed at every first boot.
Gotchas
- No guest agent. Covered above. It is the top cause of “Packer hangs waiting for IP”.
- Snippets storage not shared. A snippet on one node breaks VM start after migration to another node.
- The template disk is tiny. Resize on the clone, not the template, unless you want every VM that size.
- Stale templates. Packer does not delete old templates. Give them dated names and prune them yourself.
- Token privileges. If the build fails on a permission error, the log names the missing privilege. Add it to the role.
- Cloud-init ran once already. If you boot a template to tweak it by hand, run
cloud-init cleanbefore converting back, or clones skip their first-boot setup. - Secrets in HCL. Keep the token in an environment variable or a variable file outside git.
The SumGuy Take
Cloud-init covers most homelab needs for the price of one afternoon, and it never needs a build server. Add Packer when “what is in that template?” becomes a question you cannot answer from memory. Your 2 AM self will appreciate a rebuild that is one command and a diff.
Common Questions
Can Packer build on top of a cloud-init template in Proxmox?
Yes. The proxmox-clone builder clones an existing template, runs provisioners, and saves a new template. Set cloud_init = true and a cloud_init_storage_pool so the result keeps a cloud-init drive. Clones of the new template then personalize themselves exactly like clones of the original.
Do I need qemu-guest-agent in a Proxmox template?
Yes, for Packer and for a clean shutdown and IP display in the UI. Ubuntu cloud images do not ship it. Install it through a cloud-init vendor-data snippet, or bake it into the image before import with virt-customize. Then set --agent 1 on the template.
Why does my Proxmox clone ignore its cloud-init settings?
Usually the guest already ran cloud-init once, so it skips first-boot setup. Run cloud-init clean on the template VM before converting it, and confirm the clone has a cloud-init drive attached. Also check that the OS image actually includes cloud-init.
Where do cloud-init snippets go in Proxmox?
Snippets live on a storage with the Snippets content type enabled, in its snippets/ folder. For the default local storage that is a directory on the node. Every node that might run the VM needs access to the file, or the VM fails to start after migration.
Is Packer worth it for a small homelab?
Not at first. With under five or ten VMs, a cloud image plus cloud-init gives you reproducible clones without any new tooling. Packer pays off when you rebuild templates on a schedule, bake in hardening, need an audit trail, or install an OS that has no cloud image.