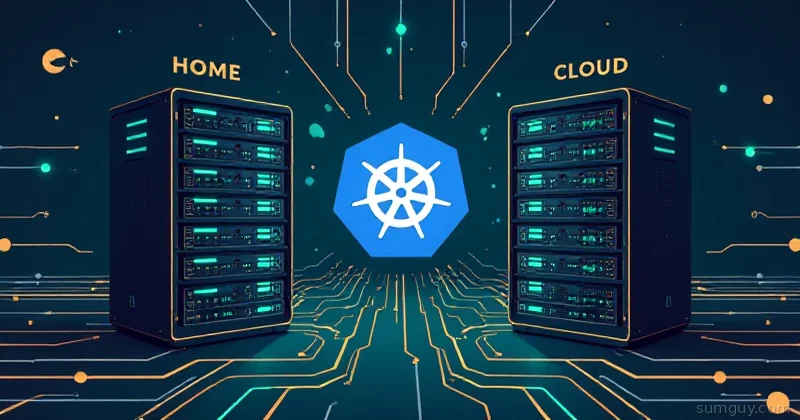
Your Cluster Doesn’t Have to Live in One Place
Here’s a situation you’ve probably been in: you’ve got a capable home server running k3s, but you keep running into the same wall, your ISP won’t give you a static IP, your router’s port forwarding is flaky, and exposing anything to the internet means dancing with DDNS and hoping your CG-NAT situation doesn’t ruin your weekend.
Meanwhile, Hetzner will sell you a VPS with a real public IP for €4/month. OCI will give you one free if you’re patient enough to actually catch one in stock.
What if you could treat both of those as nodes in the same cluster? One kubectl context. Workloads that need a public IP go on the VPS. Workloads that need your beefy home hardware or your NAS stay at home. Tailscale stitches the whole thing together over WireGuard, and k3s has shipped a built-in Tailscale integration since 1.27.3 (it landed as experimental and has matured since) so you don’t have to do anything sketchy to make it work.
This is actually achievable. Let’s build it.
The Architecture (and What You’re Signing Up For)
Here’s the setup we’re targeting:
- Node 1 (control plane + worker): Your home server. Runs k3s in server mode. This is where etcd lives, where your stateful workloads live, where your NAS-backed storage lives.
- Node 2 (worker): A Hetzner CAX11 or OCI free-tier ARM instance. Runs k3s in agent mode. Handles ingress, CI runners, anything that benefits from a public IP.
- Tailscale: The overlay network. Every node joins your Tailnet. k3s uses Tailscale IP addresses for node-to-node communication instead of the physical NICs.
Inter-node traffic flows over WireGuard (Tailscale’s transport). Between continents you’re looking at 200 to 700ms latency. Within the same continent (say, home in Germany, VPS in Nuremberg), you can get 30 to 50ms. That’s not LAN, but it’s fine for anything that isn’t a latency-sensitive database.
What this is good for: CI runners, image registries, external-facing ingress, lightweight apps, workload orchestration. What this is not good for: distributed storage across sites (more on that below), anything that needs sub-5ms node communication.
One more thing before we start: Tailscale uses the 100.64.0.0/10 CGNAT address space for its overlay IPs. You must choose cluster CIDRs that don’t overlap with that range. k3s defaults are 10.42.0.0/16 (pods) and 10.43.0.0/16 (services), those are fine. Don’t change them to anything in 100.64.0.0/10.
Prerequisites
- Tailscale account (free tier is fine)
- A Tailscale auth key: grab one from login.tailscale.com/admin/settings/keys. Use a reusable, pre-authorized key so nodes join without human interaction.
- k3s 1.31 (we’re using the built-in Tailscale VPN integration, available since 1.27.3)
- Two machines: home server (Ubuntu 22.04 / Debian 12 tested) and a VPS
kubectlinstalled on your workstation
Step 1: Install Tailscale on Both Nodes
Do this before running k3s. Tailscale needs to be up so k3s can detect the interface.
# Run on BOTH nodescurl -fsSL https://tailscale.com/install.sh | shThen bring Tailscale up on each node. Use the same auth key:
sudo tailscale up --authkey=tskey-auth-YOUR_KEY_HERE --advertise-tags=tag:k3s-nodeVerify both nodes are visible in your Tailnet:
tailscale statusYou should see both hostnames with their 100.x.x.x addresses. Write those down, you’ll need the home server’s Tailscale IP in the next step.
Step 2: Install k3s on the Home Server (Control Plane)
k3s 1.27+ supports --vpn-auth as a first-class flag for Tailscale integration. This tells k3s to use Tailscale as the flannel backend, routing all inter-node traffic over the overlay network instead of the physical interface.
curl -sfL https://get.k3s.io | sh -s - server \ --vpn-auth="name=tailscale,joinKey=tskey-auth-YOUR_KEY_HERE" \ --cluster-cidr=10.42.0.0/16 \ --service-cidr=10.43.0.0/16 \ --flannel-backend=none \ --disable-network-policy \ --node-name=home-server \ --write-kubeconfig-mode=644Wait about 30 seconds, then check that the node is up:
sudo kubectl get nodes -o wideExpected output:
NAME STATUS ROLES AGE VERSION INTERNAL-IP EXTERNAL-IP OS-IMAGEhome-server Ready control-plane,master 45s v1.31.4+k3s1 100.x.x.x <none> Ubuntu 22.04.4 LTSThat INTERNAL-IP should be the Tailscale IP, not your LAN IP. If it’s showing your physical NIC IP (192.168.x.x), something’s wrong with the vpn-auth setup, double-check that Tailscale is running before k3s.
Grab the join token. You’ll need this for the worker node:
sudo cat /var/lib/rancher/k3s/server/node-tokenCopy that string. It’s long and ugly. That’s normal.
Step 3: Join the Worker Node (VPS)
SSH into your Hetzner or OCI instance. Tailscale should already be running from Step 1.
Set the home server’s Tailscale IP and the join token as variables, then run the agent install:
K3S_SERVER_TAILSCALE_IP="100.x.x.x"   # Home server's Tailscale IPK3S_TOKEN="K10...your-long-token..."
curl -sfL https://get.k3s.io | K3S_URL="https://${K3S_SERVER_TAILSCALE_IP}:6443" \  K3S_TOKEN="${K3S_TOKEN}" sh -s - agent \  --vpn-auth="name=tailscale,joinKey=tskey-auth-YOUR_KEY_HERE" \  --node-name=vps-worker
Back on the home server, watch for it to appear:
sudo kubectl get nodes -o wide --watchWithin a minute or two you should see:
NAME STATUS ROLES AGE VERSION INTERNAL-IP EXTERNAL-IPhome-server Ready control-plane,master 8m v1.31.4+k3s1 100.x.x.x <none>vps-worker Ready <none> 90s v1.31.4+k3s1 100.y.y.y <none>Both nodes. Both showing Tailscale IPs as their internal address. That’s your cluster.
Step 4: Set Up kubectl on Your Workstation
Copy the kubeconfig from the home server:
scp user@home-server:/etc/rancher/k3s/k3s.yaml ~/.kube/config-k3s-homeOpen the file and replace the server address:
clusters:- cluster: server: https://100.x.x.x:6443 # Use home server's Tailscale IPThen set up your context:
export KUBECONFIG=~/.kube/config-k3s-homekubectl get nodesYour workstation also needs to be on the same Tailnet, obviously. If you’re already running Tailscale locally, this just works.
Step 5: Deploy a Test Workload
Let’s validate the cluster actually works by running nginx and exposing it:
apiVersion: apps/v1kind: Deploymentmetadata: name: nginx-test namespace: defaultspec: replicas: 2 selector: matchLabels: app: nginx-test template: metadata: labels: app: nginx-test spec: containers: - name: nginx image: nginx:1.27-alpine ports: - containerPort: 80---apiVersion: v1kind: Servicemetadata: name: nginx-test namespace: defaultspec: type: NodePort selector: app: nginx-test ports: - port: 80 targetPort: 80 nodePort: 30080kubectl apply -f test-nginx.yamlkubectl get pods -o wideYou should see pods distributed across both nodes (scheduler permitting). Hit the NodePort on either node’s Tailscale IP:
curl http://100.x.x.x:30080 # Home servercurl http://100.y.y.y:30080 # VPS workerBoth should return nginx’s default page. Pod-to-pod traffic crossing the site boundary goes over the Tailscale WireGuard tunnel.
The Networking Reality Check
Honest talk: cross-site pod networking has trade-offs you need to understand before you put anything production-adjacent on this.
MTU: Tailscale’s WireGuard tunnel adds overhead. The effective MTU inside the tunnel is 1280 bytes. k3s/flannel will usually handle this correctly, but if you see random connection drops or TCP weirdness with large payloads, add this to your k3s server config:
flannel-iface: tailscale0Latency: 200 to 700ms intercontinental is real. Anything that makes multiple synchronous cross-site calls will feel it. Design your workloads so that chatty services are co-located on the same node. Put your frontend and API on the VPS, put your database and storage at home, don’t have the API making per-request calls to home storage.
DNS: Tailscale’s MagicDNS handles inter-node hostname resolution automatically. Your nodes can reach each other as home-server.your-tailnet-name.ts.net and vps-worker.your-tailnet-name.ts.net. Kubernetes DNS (cluster.local) works normally across both nodes, kube-dns runs on the control plane and serves all pods regardless of location.
Storage: Don’t Distribute It Across Sites
This is the part where people get burned. Longhorn, Rook/Ceph, and other distributed storage systems are designed for low-latency LAN links. Running Longhorn replication across a 200ms WireGuard link will make your storage flaky, slow, and occasionally corrupt under split-brain conditions.
The right approach for multi-site k3s:
At home: Run Longhorn (or local-path provisioner) normally. Replicate within the home nodes only.
On the VPS: Use the VPS’s local disk via local-path provisioner. Don’t replicate to home.
Pin stateful workloads with nodeSelectors so they stay on the right node:
spec: template: spec: nodeSelector: kubernetes.io/hostname: home-serverFor backup/DR between sites, use something like Velero with an S3 backend (Backblaze B2, Cloudflare R2) rather than trying to do live replication across the WireGuard link.
Failure Modes (and How to Handle Them)
Your home internet drops. The home server becomes unreachable. etcd loses its only member. The VPS worker keeps running existing pods (kubelet caches state), but no new scheduling happens. When connectivity returns, the server comes back, etcd recovers, and the scheduler resumes. Downtime on control-plane operations only, existing workloads on the VPS keep running.
The VPS goes away. k3s marks the worker NotReady after 5 minutes (default pod eviction timeout). Workloads on the VPS get evicted and rescheduled to the home node. This works fine as long as the home node has capacity.
You want actual HA. Single-server k3s has a single point of failure at the control plane. If you want true HA, you need three server nodes (for embedded etcd quorum) or an external datastore. For a two-site setup, use an external Postgres on something like Supabase or your own VPS Postgres:
curl -sfL https://get.k3s.io | sh -s - server \ --datastore-endpoint="postgres://k3s:password@db-host:5432/k3s" \ --vpn-auth="name=tailscale,joinKey=tskey-auth-YOUR_KEY_HERE"This moves the state out of the local etcd and into a proper database, so you can have multiple server nodes without worrying about etcd quorum across a WAN link.
Exposing Services Publicly (Tailscale Funnel)
If you want to expose a service on the VPS to the public internet without buying a LoadBalancer, Tailscale Funnel is an option. Run this on the VPS node:
sudo tailscale funnel --bg 30080This exposes port 30080 on the VPS’s Tailscale-issued domain (vps-worker.your-tailnet.ts.net) to the public internet via Tailscale’s infrastructure. No firewall rules, no static IP management.
For proper production ingress, deploy nginx-ingress or Traefik on the VPS and configure your DNS to point at the VPS’s public IP. The VPS has a real public IP, use it.
Should You Bother?
Yes, with clear expectations.
This setup genuinely solves the “I want Kubernetes but my home ISP is garbage” problem. You get a real cluster with a real public endpoint, real pod networking across two sites, and a single kubectl context for everything. Tailscale handles the WireGuard mesh, k3s 1.31’s native vpn-auth integration handles the rest.
It’s not a replacement for a proper multi-region cloud setup. The latency is real. The single-server control plane is a liability if the home node has downtime. But if you’re running hobby infrastructure, CI pipelines, personal projects, or homelab experiments, this is a legitimately useful pattern that costs about €4/month in VPS fees and runs on hardware you already own.
The architecture is also honest about what Kubernetes is good at: scheduling, service discovery, health checking, rolling deploys. It doesn’t magically make a 400ms network link fast. Design accordingly, keep chatty services co-located, keep storage local, use the VPS for what a VPS is good at (public IP, egress, ingress).
Start with two nodes. See if the latency bothers you for your actual workloads. Add a third node at another site if you need actual etcd HA. The foundation works.